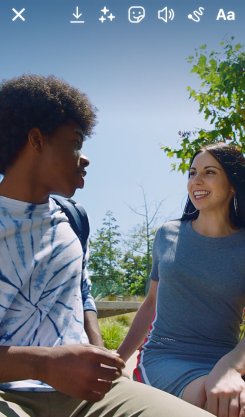
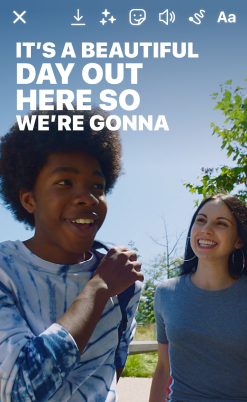
Instagram Reels is a great way for creators and businesses to get their message out to their audience in a short video format.
But there’s one thing often overlooked: adding captions to these Reels as that really does make a huge difference. Captions improve your content's accessibility, increase reach, and boost engagement.
Wondering “How to add subtitles to Instagram Reel?”. Don’t worry, we have got you covered!


Benefits of Learning How to Add Subtitles to Instagram Reel
Improved Accessibility
Adding captions to your Instagram Reels helps your content reach a larger audience, including individuals who are deaf or hard of hearing or who prefer videos without sound. This inclusivity not only shows you're committed to making the online space more inclusive but also increases your potential reach.
Better Engagement and Watch Time
It’s been shown in studies that videos with captions keep viewers engaged for a lot longer. So, learning how to put captions on Instagram Reels will let viewers keep up with your content even if they can’t or choose not to use audio, like in a noisy environment or while multitasking. This extra time spent watching will help your Reel perform better on the Instagram algorithm. And can potentially lead to higher engagement and visibility.
Enhanced User Experience
Having captions on your videos can help viewers get the gist of your Reel even when they can't hear the audio. This improved user experience can lead to higher retention rates and a more positive perception of your brand or content.
How to Add Captions on Reels
Now that we've gone over why you need to caption those Instagram Reels, let's look at how you can actually do it.
Instagram's Built-in Captioning Tools
Instagram offers a built-in captioning feature that makes it easy to add captions to Reels, including voice captions.
Here's how you can take advantage of this tool:
- Create your Reel as you normally would.
- Tap the "Sticker" icon that you’ll find at the top of the screen.
- Select "Captions".
- Instagram will automatically generate captions for your Reel, in case there is someone talking in the video.
- Review the captions and make any edits or corrections by double-tapping the subtitles and choosing the word that you’d like to change.
- Customize the font and positioning of the captions. To change the color of the captions, tap the rainbow icon and select a color.
<iframe width="560" height="315" src="https://www.youtube.com/embed/oO6shMJpOUA?si=XM2dkBeNicEqRhE8" title="YouTube video player" frameborder="0" allow="accelerometer; autoplay; clipboard-write; encrypted-media; gyroscope; picture-in-picture; web-share" referrerpolicy="strict-origin-when-cross-origin" allowfullscreen></iframe>
Third-Party Captioning Tools
Instagram has some handy built-in captioning tools, but they might not always give you the exact results you need. If you’re looking for more flexibility or customization, there are third-party tools out there like Submagic, Tella, Riverside, or Screen Story that can help you with that.
How to add captions on reels with these tools? Let’s find out.
Submagic
Submagic is an AI-powered captioning tool that can generate super accurate captions in a bunch of languages. It’s got all kinds of cool features. For example, you can style the captions however you like and integrate emojis.
Here's how to use Submagic for your Instagram Reels:
- Visit the Submagic website and find the "Caption Generator" section.
- Upload your Reel video file.
- Wait a few minutes for the AI to generate captions.
- Review and edit the captions. You can customize the font, color, and add any animations.
- Export the captioned video and upload it to Instagram as a Reel.
<iframe width="560" height="315" src="https://www.youtube.com/embed/mryBoHbbb_4?si=Ajs5lLzb_vvLDlxY" title="YouTube video player" frameborder="0" allow="accelerometer; autoplay; clipboard-write; encrypted-media; gyroscope; picture-in-picture; web-share" referrerpolicy="strict-origin-when-cross-origin" allowfullscreen></iframe>
Tella
Tella is a screen recording and captioning tool made for content creators. It has built-in captioning, plus editing and customization options to suit different needs. The tool will help you figure out how to edit captions on Instagram Reels and make sure that your voice captions are on point.
To use Tella for your Instagram Reels, you should:
- Sign up for a Tella account and log in.
- Record your screen or upload an existing video.
- Tella will automatically generate captions for your video.
- Edit the captions as needed.
- Export the captioned video and upload it to Instagram.
<iframe width="560" height="315" src="https://www.youtube.com/embed/sf5DX3L2AKU?si=nGijNLwmJM5ZbcL8" title="YouTube video player" frameborder="0" allow="accelerometer; autoplay; clipboard-write; encrypted-media; gyroscope; picture-in-picture; web-share" referrerpolicy="strict-origin-when-cross-origin" allowfullscreen></iframe>
Riverside
Riverside is an all-in-one video and podcast platform with lots of cool features, including captioning. It has accurate AI transcription and lets you add captions directly to your videos or export them as separate captions files.
- Log in to your Riverside account and select the recording you want to caption.
- Choose between automatic or manual captioning to generate a transcript.
- Review and edit the transcript.
- Customize the way your captions look. Change the font, color, size, and positioning of the captions if needed.
- Export your video with captions burned in or download a separate caption file (e.g., SRT).
- Upload the captioned video to Instagram.
<iframe width="560" height="315" src="https://www.youtube.com/embed/VjU9GQVNS5k?si=BEF66pAqsVqBqFl7" title="YouTube video player" frameborder="0" allow="accelerometer; autoplay; clipboard-write; encrypted-media; gyroscope; picture-in-picture; web-share" referrerpolicy="strict-origin-when-cross-origin" allowfullscreen></iframe>
The main downside of the platform is that many users might find it to be way too complex. If you’re looking for something more straightforward, then you should check out Screen Story.
How to Add Closed Captions on Instagram Reels
What people typically mean by ‘closed captions’ when they’re talking about Instagram Reels is the gray box with the subtitles that appears right beneath your video (not on the actual Reel).
Such captions can be generated by Instagram automatically, and you won’t be able to change the font or the color. However, they can be helpful if you don’t want the subtitles to cover your video or if you feel like open captions are a bit too ‘in your face’.
To add closed captions simply:
- Upload your Reel and hit “CC” icon from the editor screen.
- Then select “Captions.”
- Your spoken audio will be automatically transcribed by Instagram and will appear on the screen.
It will literally take you a few seconds to create them. So, if you need to post the video ASAP, such subtitles might be a great option.
The captions will also appear below the video, which means that your viewers will actually get to choose whether they want to read them or not.
Now you know how to add closed captions on Instagram Reels.
Some Tips for Making Your Instagram Reels More Effective and Engaging
Ensure Caption Accuracy
It's super important to have accurate captions so your content stays intact and your viewers have the best experience possible.
Go over the automatic captions and make sure they're perfect, fixing anything that's not quite right. Capture nuances that automated systems may have missed and learn everything you can about how to edit captions on Instagram Reels.
Optimize Caption Design
Think about the design elements of your captions, like font size, color, and background, to ensure they're easy to read and blend in with the look and feel of your Reel. Try to find a happy medium between visual appeal and readability. Your captions should match the vibe of your content, not distract from it.
Hint: black and white are considered to be the most readable font colors when it comes to captions. In fact, any combination of black and a light color can be a great option. Whatever you do, don’t use neon colors in captioning. They make it extra difficult for the reader to focus on the text and are simply an eyesore in the absolute majority of cases.
Timing and Synchronization
It's important to get the timing and synchronization of captions right for a smooth viewing experience. Make sure your captions match the audio and appear and disappear in sync with the corresponding dialogue or audio cues. Use captioning tools that let you adjust timing and synchronization as needed.
Even though most people watch videos online without sound, there is nothing worse than realizing that the captions do not match with what’s going on on the screen.
https://www.youtube.com/shorts/4COy8OQmR2Q
Get the Most Out of Your Videos with Screen Story
While the methods mentioned above can help you add captions to Reels, there's a tool that takes captioning and video enhancement to the next level - Screen Story. This handy Mac screen recording tool is designed to take your ordinary recordings and transform them into high-quality videos and GIFs. No need to be a video editing pro!
{{blog-ad}}
With Screen Story, you can effortlessly record your screen while automatically applying various design enhancements, including:
- Smooth cursor movements
- Automatic zoom-ins on actions
- The ability to add captions, and a lot more
The tool lets you customize it however you want, so you can choose from a variety of backgrounds, adjust your cursor settings, add motion blur, and even incorporate your selfie camera footage for more dynamic presentations.
<iframe width="560" height="315" src="https://www.youtube.com/embed/Eh-_mnGKQqI?si=HnBh8NO5Pxo5KZaa" title="YouTube video player" frameborder="0" allow="accelerometer; autoplay; clipboard-write; encrypted-media; gyroscope; picture-in-picture; web-share" referrerpolicy="strict-origin-when-cross-origin" allowfullscreen></iframe>
Learning how to put captions on Instagram Reels is no longer just an optional extra – it's a necessity for reaching a wider audience, improving engagement, and providing an inclusive viewing experience. By following the tips and tricks mentioned in this guide, and considering tools like Screen Story, you can create stunning Instagram Reels that will stand out from the crowd, engage your audience, and effectively get your message across.
Create stunning videos with Screen Story
Record your screen with audio and create stunning videos without editing skills. Screen Story applies the best design patterns to the video automatically.


.webp)

.webp)