


.webp)
When it comes to video creation, screen recording is an essential tool for a lot of reasons. You can use it to create tutorials, product demonstrations, online courses, and much more. But sometimes, a simple screen recording might not be enough to engage your audience effectively. That’s where learning how to show your face while screen recording comes in.
Adding your face to a screen recording lets you bring your personality to the table, show what you're feeling, and create a more personal experience for your viewers.
So, Why Record Your Screen and Face Together?
Recording with Facecam Improves Viewer Engagement
Seeing the creator's face during a screen recording can help build a stronger connection with the audience. It makes the video more relatable and engaging.
Whether you're showing off a software feature, explaining something tricky, or giving instructions, your facial expressions and emotions can make the message easier to understand and follow along with.
It Makes the Content More Trustworthy
If you record screen and face simultaneously, it makes your content seem more credible and trustworthy to your viewers.
They can actually see the real person behind the screen and that will add authenticity and transparency to the video. Especially those working in a field like online education, where it's important to build trust and rapport with your students will be able to benefit from such content.
It Helps Make Your Content Clearer
When you show your face in the corner during a screen recording, you can provide extra context and clarity for your viewers.
For instance, if you’re demonstrating a complex process or explaining a technical idea, you can use your facial expressions and gestures to bring the viewers’ attention to certain points or clarify any potential confusion. That’s one of the main reasons why many people want to learn how to screen record with your face in the corner.
How to Choose the Perfect Screen and Face Recorder Tool
If you want to record your screen with your face in the corner, you'll need a tool that supports this feature. There are lots of options, both paid and free, for different platforms such as Windows, Mac, Android, and iOS.
Here are a few popular picks to check out:
Desktop Tools
- Awesome Screenshot & Recorder: This handy tool is available as a browser extension for Chrome, Firefox, Edge, and Safari. You can use Facecam and audio to record what’s on your screen.
- OBS Studio: It's a free software program that lets you record your screen with a webcam.
- Screencastify: This Chrome extension lets you record your screen, webcam and microphone, which is great for making video tutorials and presentations.
Mobile Tools
- Mobizen: A handy mobile screen recorder that lets you capture your screen and audio with Facecam on your Android or iOS device.
- DU Recorder: Another screen recorder for Android and iOS that supports Facecam recording, video editing, and live streaming to platforms like YouTube and Twitch.
When picking a screen recorder Facecam tool, think about such things as how simple it is to use, the quality of the recordings it allows to create, the editing features you get, and whether it’s compatible with the devices and operating systems you already use.
How to Record Screen and Face the Right Way
Now that you've picked the right screen recorder with Facecam, it's time to get it set up for the best recording.
Here are some general steps to follow:
Get Your Recording Environment Ready
- Make sure your recording area is nice and bright, and free from anything that might get in the way, like background noise or distractions.
- Position your webcam or external camera so your face is in focus.
- Finally, make sure your microphone settings are on point, because you don’t want to miss a word. The position of your mic is also important. You might want to simply ensure that it’s not too far or too close (about 6-12 inches away from your mouth).
Time to Set Up the Recording Settings
- Open your screen and face recorder tool and choose the recording mode you want—full screen, window, or custom area.
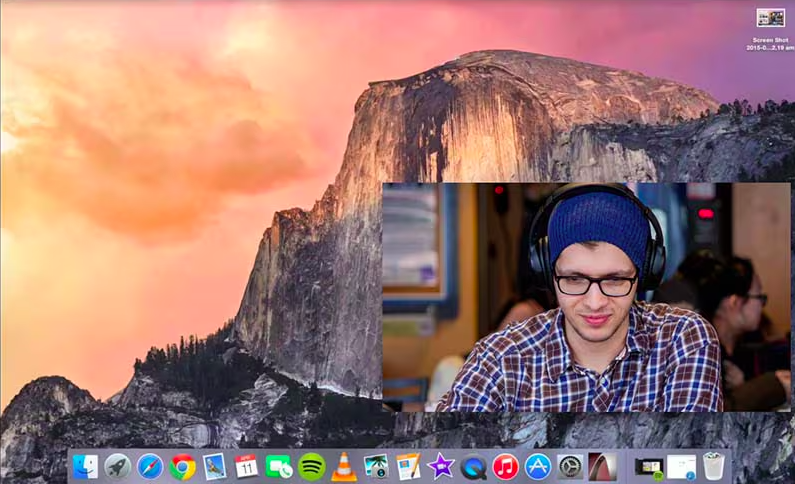
- Adjust the placement and size of the facecam window on your screen. Usually, streamers prefer to keep their face in one of the corners. Most streamers prefer to put the bubble in one of the lower corners as it can feel awkward to see yourself floating.
- Double-check the audio settings to record your voice or other audio sources you want to include in high quality.
- You can then tweak the video quality, frame rate, and resolution settings as needed. Most tools already have pretty good default settings that will work for the majority of users, so you might choose to skip this step.
Don’t Forget to Perform a Test Run
Before you get down to recording your content, it'd be a good idea to do a quick test run to make sure everything's working as it should. This will help you to:
- Check whether your face is looking nice and lit in the recording.
- Ensure that the quality and the level of audio is great. You can’t even imagine how many recording were ruined simply because the content creator forgot to turn on the mic!
- Double-check that the screen capture area is free from any unwanted elements.
- Take care of any potential issues before giving your all during the final recording.
Here’s Some Tips for Using Screen Recorder Facecam Tools
Keep the Lighting and Camera Positioning Consistent
The way you light your face and position your camera makes a big difference to how good your facecam recording is going to be.
Make sure you get your face well lit, either by using natural light or putting up some lamps or ring lights. The latter are an amazing option because they provide uniform, soft illumination and minimize shadows. Natural light can also make your face look great, but it changes way too quickly. That might become a problem, if you’re planning on recording for quite a few hours.
Put the camera at your eye level or a bit higher to get the angle you want. If you place the camera too low, your viewers will have a feeling that you’re looking at them from above which is not a nice sensation.
Take Advantage of Visual Aids and Gestures
When you're recording your screen and face together, use visual cues and body language to make your explanation more engaging. For example, you can use a pointer or highlighter to draw attention to parts of the screen, or use gestures to show what's important.
Fun fact: there are certain gestures that can immediately increase the value of whatever it is you’re saying. Those include “The Box”, “Pyramid Hands”, and a few others.
Try to Maintain Eye Contact
It’s easy to get caught up in what you're saying on the screen, but it’s important to look at the camera every now and then. This will make it easier to connect with your audience and keep them interested in what you’re saying.
You wouldn’t have to maintain eye contact consistently though (that can easily turn into staring, and not everyone likes that). So, make sure you look away every once in a while to consult your notes or show something on the screen, for example.
Make the Most of Editing Tools
Learning how to screen record with your face in the corner is not enough. You should also understand how to edit the content that you’ve captured.
Many screen recorder tools let you edit your recordings to make them even better.
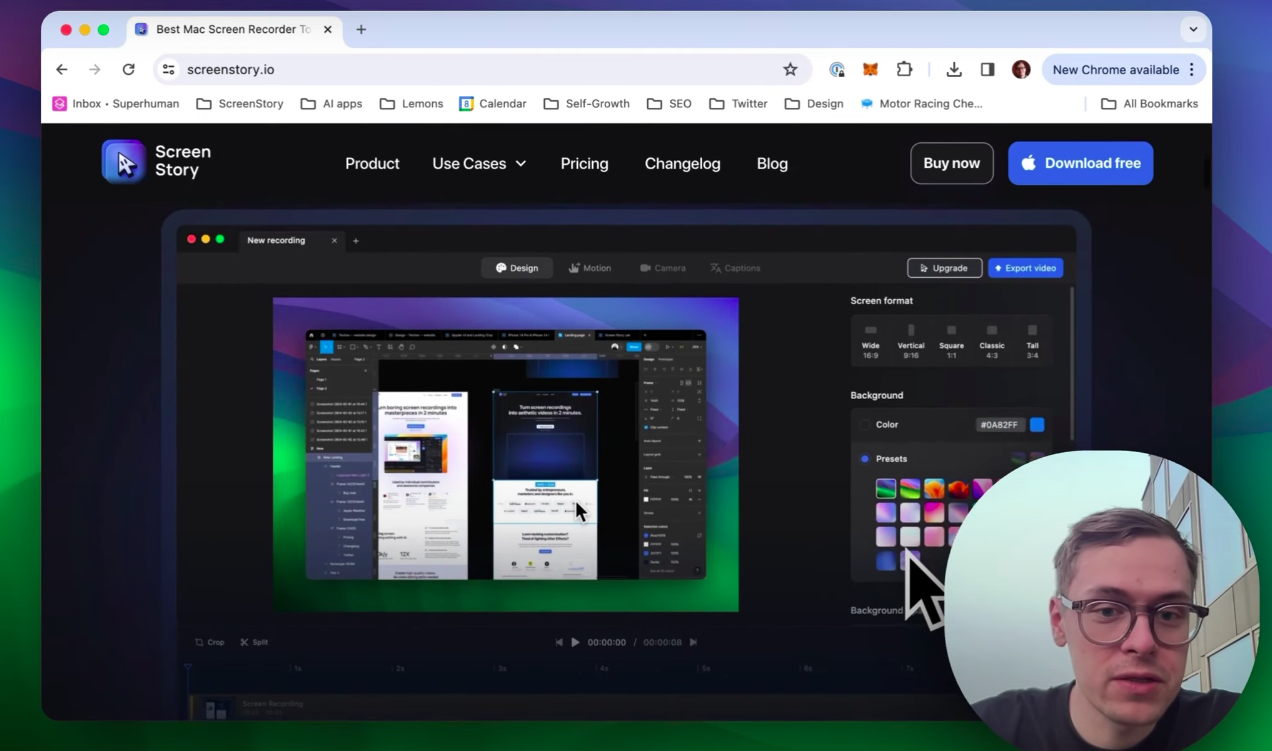
If you're looking for a powerful and user-friendly screen recording tool with Facecam support for Mac, Screen Story is a great choice. With its intuitive interface and advanced features, Screen Story makes it easy for you to create stunning video demos, tutorials, and social media content.
Some of the tool’s key features include:
- Automatic zoom-in on actions you perform on the screen
- Smooth cursor movement for a polished look
- The ability to record your voice to add narration and explanations
- A variety of backgrounds and window frames
- Seamless switches between your face, the screen, or both with animations
- The ability to adjust cursor settings, add motion blur, and more
Learning how to show your face while screen recording has never been this easy. Give Screen Story a try and take your screen recordings with facecam to the next level!
Create stunning videos with Screen Story
Record your screen with audio and create stunning videos without editing skills. Screen Story applies the best design patterns to the video automatically.
.webp)

.webp)
